Thursday, July 1, 2010

Magical Peanut Butter

Photobucket
The Culprits

The most recent couple of times I noticed that peanut butter was making something taste better, I chalked it up to coincidence and the fact that it had the term butter in the title. Butter pretty much makes everything better. Then is started to notice that things I didn’t necessarily enjoy on their own were made incredibly tasty with the addition of some kind of peanut butter. Could this be mere chance? After a mild deliberation with my culinary memory, I made the eureka-like epiphany that peanut butter has actual magical powers and should be revered amongst all staple pantry ingredients. Think about the logistics of this statement. Celery and apples are quite boring on their own but smear them with peanut butter and you have a tasty snack that even kids love. A piece of whole grain toast is made delectable with peanut butter spread on it. Chocolate cupcakes are good on their own, but really they are just a vehicle for peanut butter frosting. The list goes on and on, its official; peanut butter is magical.

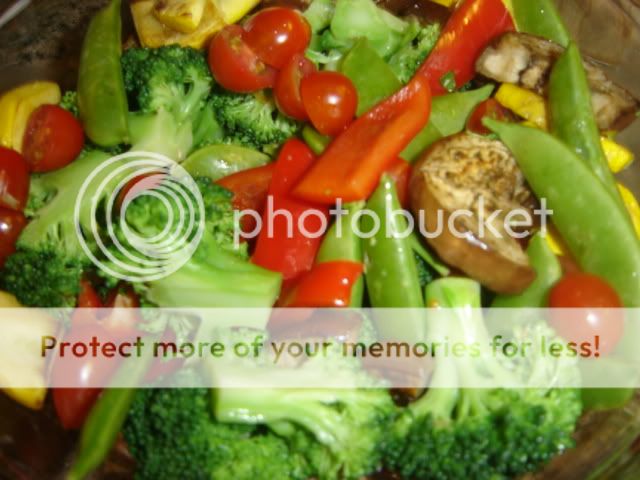
So now it’s time to apply it to a more substantial dish. Summer is here and summer vegetables are abounding at every market and begging to be eaten. Eggplant, bell peppers, broccoli, summer squash and tomatoes are all incredibly good for you, require little preparation (if any at all, I usually just stand at the counter and eat the entire carton of baby tomatoes) and make a great one dish meal, especially with the addition of a little protein. And here is where the magical peanut butter comes in. When dealing with kids, and even many adults (who are we kidding here), a dish composed entirely of vegetables is not often the most appealing dinner meal. Eureka moment alert: pour a peanut butter based dressing over said vegetables and suddenly it’s a rush for seconds at the dinner table. Another great quality about this dish is that you can easily swap out ingredients for whatever you prefer. I love it with blanched asparagus when the season is right.

So there it is, my quasi argument for the supernatural nature of peanut butter. And bear in mind, my choice of peanut butter is the super healthy, all natural, and no sugar or additives kind. Imagine what a jar of skippy would bring to the recipe…

Photobucket

Mixed Vegetables with Asian Peanut Dressing

2 bone in skin on chicken breasts
1 tbs olive oil
1 medium summer squash, halved lengthwise and cut into half moons
1 small Japanese eggplant, halved lengthwise and cut into half moons
1 large head of broccoli, cut into florets
1 red pepper, cut into strips
1 cup fresh snap peas
¼ cup diced scallions
1 cup cherry tomatoes

Dressing:

¼ cup smooth peanut butter
1 tbs honey
½ cup vegetable or canola oil
1 large garlic clove, minced
1 tsp minced fresh ginger
3 tbs low sodium soy sauce
1 tsp sesame oil
2 tbs apple cider or apple cider vinegar

Preheat oven to 350 degrees. Lay chicken breasts on a rimmed baking sheet and bake approximately 35 minutes, until cooked through. Set aside to cool.

To make dressing, microwave the peanut butter and honey in a heatproof bowl for 10-20 second, until easy to stir. Add remaining ingredients and whisk to combine.

In a non stick skillet over medium low heat, cook the eggplant and squash in the olive oil until soft and starting to brown, about 10 minutes, turning heat up towards the end to caramelize the vegetables. Pour into a large bowl and add peppers, snap peas, tomatoes and scallions. Add an inch of water to the skillet and bring to a bowl. Add the broccoli florets, cover and cook 2-3 minutes. Drain and run under cold water to stop cooking process. Add to bowl with other veggies. Remove skin from chicken and shred into bite size pieces. Discard bones and skin. Add to bowl and pour dressing over to moisten. Wonderful served over brown rice. Makes 4 dinner portions.

Thursday, June 10, 2010

Crusty Around the Edges

Photobucket

I am such a slacker. I know it’s been a ridiculously long time since I’ve posted anything. Sometimes a girl just gets a little busy. What with a relaxing vacation to Hawaii, an engagement, keeping up with client demands and wedding planning, how dare I not post anything for Almost Two Whole Months! So sorry. To make it up to you, I shall give you the crostata! My favorite food season is beginning and peaches, nectarines and apricots have commenced as being my entire diet. As in I buy a pound from my guy at the farmers market at 3 pm on Tuesday, and by 10 am Wednesday, the entire lot is in my tummy. I am ridiculous with fruit.

So it’s time to start making summer fruit desserts. The jams are on deck, especially since they are going to be favors at my nuptials (awwww, how sweet, homemade jam as gifts!) and the summer pudding is begging to be made, but the crostata is a huge guest and client impresser so I’ve been turning em out like it’s going out of style. This dessert has the added bonus of making extra crust to be used at a further time. And I have yet to meet a crust I didn’t like.

For the Crust:

2 cups all purpose flour
¼ cup sugar
Pinch of kosher salt
2 sticks unsalted butter, diced and frozen for 20 minutes
¼ cup ice water

For the Filling:

1 ½ pounds peeled and pitted/cored fruit (apples, pears, peaches, plums, nectarines, etc)
¼ cup flour
¼ cup brown sugar
Pinch of kosher salt
¼ tsp cinnamon (if using apples or pears)
½ stick unsalted butter, diced

To make the crust:

Place the flour, sugar and salt in a food processor and pulse a couple of times. Add the cold butter and pulse 10 to 15 times, until the butter is crumbly and in small pieces. With the motor running, add the ice water and then pulse until the dough almost comes together in a ball. Dump onto a floured surface and form two balls. Flatten into a disk and wrap each one in plastic wrap. Freeze one for another time and put the other one in the fridge for 30 minutes.

Preheat the oven to 450 degrees and line a rimmed baking sheet with parchment paper.
Roll the crust into an 11 inch circle on a floured surface and place on the baking sheet.

Photobucket

Cut the fruit in half and then into large chunks and pour onto the tart dough, leaving a 1 ½ inch border around the edges. Combine the flour, sugar and cinnamon, if using in a food processor and pulse until the mixture is crumbly. Spread evenly over the fruit mixture and gently fold the dough up over the fruit, pleating where necessary to make a circle. Don’t worry about it being perfect, the point is for it to look rustic and homemade. Bake for 20-25 minutes, until dough is golden brown, let rest 5 minutes, and then carefully remove to flat surface. Serve warm, yields 8-10 servings.

Wednesday, April 28, 2010

It's a Salmon Smorgasbord

Photobucket

I adore the word smorgasbord and so rarely do I find an opportunity to use it in a sentence. In april and may I find myself describing the onslaught of salmon in my diet the perfect opportunity to use it. These months mark the beginning of wild king salmon season, one of my favorite times a year. When I say I love salmon, I mean I Love salmon. Love it like I love foot massages and half price designer jeans. However, I don’t eat farmed salmon, for reasons that hopefully don’t sound too preachy when I (gently) explain why you shouldn’t eat it either. While I stand by my moral salmon issues, I find the months between the seasons very sad.

So when the first beautiful pink fillets start appearing at my trusty fish monger’s stand, the weekly meals become pretty salmon heavy. I am of the belief that salmon needs very little to make it delicious; a smoking hot pan, a splash of olive oil, a sprinkling of kosher salt and a nice hot sear on both sides. I can usually get away with this for a month or so before my household starts kindly requesting a new form of salmon delivery. And by kindly request, I mean begs for another form of protein besides the scaly, gilly kind that swim upstream to spawn.

Photobucket

Enter the salmon cake. Much like a crab cake in method, it’s a great way to use salmon in creating new flavors and textures. The integrity of the fish still comes through, but the potent salmon flavor is tempered by the other ingredients, few as they may be. It’s also a great way to use leftover fish of any kind, snapper, cod and halibut are all great substitutions. I will stick with salmon for now, as I simply can’t stand to part with my beloved fish. Thank goodness for the invention of the caked form of fish. It allows me to keep using my star ingredient without causing those I love to sprout gills.

Salmon Cakes

1 pound fresh wild salmon, skin on
1 Tbs heavy cream (optional)
1 cup of panko (Japanese style breadcrumbs)
1/3 cup good mayonnaise
½ cup thinly slice scallions
½ cup chopped celery
1 large egg
Kosher salt
Canola oil for cooking

Preheat the oven to 400 degrees. Line a small baking sheet with foil. Place whole salmon fillet on foil and rub with heavy cream, if using. Sprinkle with kosher salt and bake approximately 10 minutes, until salmon is almost cooked through (it will continue to cook as it sits). Set aside to cool slightly.

Mix ¾ cup of panko, mayonnaise, scallions, celery the egg and ½ tsp kosher salt in a large bowl. Once fish is cool, flake it into the bowl, discarding the skin. Mix gently, trying not to break up the salmon too much. Form the mixture into 8 patties, about 1 inch thick. Spread the remaining panko on a large plate and press the cakes into the bread crumbs until all sides are coated.

In a large nonstick skillet, heat 2 tbs of the oil over medium high heat. Fry the salmon cakes in two batches until golden brown on both sides, about 8 to 10 minutes total. Remove to a paper towel, heat 2 more tbs of the oil and repeat with the remaining cakes, adding a bit more oil if needed. Drain on paper towels and serve hot. Serves 4.

Wednesday, April 7, 2010

Don't Hate on the Fava Bean

Photobucket


As juvenile as it may seem, I still cannot think of a fava bean and not associate it with Hannibal Lector and a nice chianti. That doesn’t mean that I don’t love a good fava bean, because I do. And they do go very nicely with chianti. The liver I’m not so sold on. Fava beans are relatively underused and I understand why. They are a lot of work. First you have to shell them, this takes a nice commitment of time, and you still aren’t even done. Then you have to blanch them for a couple minutes, and you’re Still not done! They must now be peeled out of their shells. It’s a lot of work, and about 2 pounds of whole beans will yield less than a half cup of prepared beans. It’s hard to justify that, I get it. Yet, I am still drawn to them, hard work and all.

I find they are best used in a dish with few other ingredients so that the strong flavor of the bean really comes through. Lately I’ve been really into adding a punch of something salty to my dishes and this is how the bones of this dish came together. Green beans are one of my favorite green veggies, but are often bland and redundant, especially as a menu option to my clients. So I added fava beans to them and the dish was so much better. And since I was on a roll, I fried up some nice prosciutto and threw it in. Wow, what a delish flavor combination. I stared serving it to clients and so far 4 people have declared it their new favorite of my side dishes and requested it once a week. I guess I did good.

A note for those who are a bit hesitant to undertake the process of fava bean extraction; frozen beans work perfectly.

Fava and Green Bean salad with Prosciutto

1 cup shelled fava beans (from about 2 pounds whole beans)
1 pound of trimmed green beans
2 oz good quality prosciutto, diced
¼ cup toasted pine nuts
2 Tbs extra virgin olive oil
Kosher salt

Bring a large pot of water to a boil and salt generously. Add the fava beans and cook two minutes. Remove with a slotted spoon to a large bowl. Add the green beans to the boiling water and cook 3-4 minutes, until crisp tender. Pour into colander and rinse under cold water to stop the cooking. Add beans to a large mixing bowl. When the fava beans are cool enough to handle, peel back the outer shells and add the inner beans to the bowl with the green beans. Stir in the olive oil, pine nuts and a small pinch of salt.

In a non stick skillet over medium high heat, cook the prosciutto 5-7 minutes until nicely browned and crisp. Add to bean mixture and taste for seasoning. Keep in mind prosciutto is quite salty so be careful when seasoning. Serve at room temperature or slightly warm. Yields 4-6 side dish portions.

Thursday, March 25, 2010

An Ode to the Chickpea

Photobucket

I adore the chickpea. I would give the chickpea hugs if I could. I would sing it lullabies and tuck it in at night if there were a chance I wouldn’t be looked upon in horror. It is a wonderful and underused ingredient, full of fiber, protein and vitamins, and delicious to boot. It is incredibly versatile and a great substitute for meat should you want to cut back on carnivorous activities. I love my meat, but lately I have been trying, for economical reasons, to scale back on our meat purchases and include at least two vegetarian dishes each week. The chickpea comes in quite handy for this. I recently made chickpea and black bean burgers with a mango avocado salsa and believe me, the meat was not missed by anyone.

My main adulation for the chickpea comes from its versatility. Hummus is a household favorite and chickpeas are the base for any hummus. I also often replace all purpose flour with chickpea flour, which is how this recipe came about. Chickpea flour has a rich nutty flavor that adds a bit of substance to a dish that might not come from all purpose flour. It does not have the same baking quality though, and I wouldn’t recommend making a batch of cupcakes with it, but for savory dishes, I greatly enjoy the flavor imparted by chickpea, or garbanzo bean flour. Try using it when making a roux or white sauce, it gives the dish a little something extra without throwing off the original flavors of the dish.

The back story to this recipe is the time I made cheese puffs with chickpea flour replacing the ap flour in the dough for the puffs. A cheese puff is basically made from cooking flour butter and water together then mixing in eggs. When I cooked the flour, water and butter together, I thought it might make a nice batter for other items as well. Enter the chickpea fry. Once the batter is made, the dough is chilled and cut into fry-like sticks then shallow fried in oil. Yummy. The nuttiness of the flour gives the “fries” a hearty, substantial taste and they are a great accompaniment to a flaky white fish or grilled pork tenderloin. I think they do justice to the chickpea. It would be proud of me.


Chickpea Fries

2 cups chickpea flour
2 Tbs minced fresh parsley
2 minced garlic cloves
1 tsp salt
2 ¼ cups water
½ cup vegetable or canola oil, for frying

In a medium saucepan, combine all ingredients except oil and whisk to combine. Bring to a boil and whisk constantly for 1 to 2 minutes, until it forms a thick paste. Pour the dough onto a small rimmed baking sheet lined with parchment paper and spread evenly with a spatula to form a smooth surface. Refrigerate 1 hour. Remove from fridge and lay on a large cutting board. Cut dough into ½ inch wide sticks, about 4 inches long, or whatever size is to your fry liking. Prefer matchstick fries? No problem, cut them smaller.

Photobucket

In a large heavy skillet, heat several Tbs of the oil over high heat. Add ¼ of the fries and cook on all sides until golden brown. Repeat with remaining fries, adding oil as needed. Drain on paper towels, sprinkle with more salt, if desired, and serve hot. Serves 4-6 large portions.

Tuesday, March 16, 2010

A Tasty Way to Ruin Your Clothes

Photobucket

That age old saying that your grandparents taught you about some lessons in life being learned the hard way is in fact a true statement. Like that you should Never wear any articles of white clothing while prepping or cooking beets. Yep, I learned that today, when my (favorite) white pants were irretrievably marred with pink splatter marks when I got a little too excited peeling the beets. Maybe that is my punishment for wearing white before labor day. Whatever the reasoning, lesson learned. Although in the back of my mind there is a little voice asking, “you didn’t know that already?”

Ruined pants aside, I am now relishing in the fruit of my sacrifice. This delicious little appetizer is something I first made when I was working at the academy awards a few years ago. Hundreds upon hundreds of mini beet and goat cheese napoleons were passed around on silver platters that night, and it was me that made at least 150 of them. It is such a simple idea, requiring just two lovely ingredients. It’s one of those dishes that made me wonder why in the world I hadn’t thought of it before. I love beets and goat cheese in salads, so why not make a dish out of those two items alone? And while we’re at it, let’s make it incredibly pretty with a striking presentation.

A few words of wisdom on making the napoleons; use dental floss to cut the goat cheese and be sure to wipe the knife blade between cuts. I know it sounds strange to use teeth paraphernalia in the kitchen, but I assure you, nothing works better to slice through soft cheese.

Photobucket

Beet and Goat Cheese Napoleons

1 lb fresh beets, any color you like
1 log of goat cheese
Sea salt for serving (optional)

Bring a large pan of water to a boil over high heat. Chop the greens off the beets (if you are feeling experimental, save these and try cooking them, they are Delicious! Like swiss chard, only without all the bitterness and with all the health benefits.) Trim the tail off the beets too, if they have one and place in the boiling water. Reduce heat and simmer for 40 to 50 minutes, until tender when pierced with a fork. Drain and set aside to cool. When cool enough to handle, remove the skins by rubbing with your fingers. They should come right off. Slice the beets horizontally into ¼ inch slices and set on papers towels to absorb some of the redness.

Place the goat cheese in the freezer for 20 minutes before you slice it to help it firm up a bit.

Lay the log of goat cheese on a cutting board and using a long piece of dental floss, slide the floss underneath the log and pull up on the two ends, about a ¼ inch from the end. You want to end up with similar size slices as the beets. Repeat with remaining cheese. If you are using large beets, flatten slices slightly with your palm so they reach the edge of the beet slices. Lay a goat cheese slice on top of a beet and then top with another beet slice. You can make them two layers for a more dramatic presentation, but I like to stick with one layer. Slice in half, rinse the knife and then slice into quarters. Sprinkle with a bit of sea salt for a nice finish and serve.

Thursday, February 25, 2010

My first attempt to be cool like Daniel Boulud.

Photobucket

For as big of a foodie as I consider myself, I am a bit behind the times on the new up and coming chefs in the industry. I’m sure it is partly because I’m not a restaurant chef, but also because I don’t really eat out and try new places. I read as much as I can and am always interested in new culinary flavors and trends, I just couldn’t tell you much about the It chefs of the previous years. On the flip side, chefs like Eric Ripert, Thomas Keller and Daniel Boulud are legends in my mind. True pioneers of the culinary world and as revered to me as Frank Gehry is to my architect boyfriend.

Daniel Boulud is my subject of interest today, and the aforementioned boyfriend recently gave me an article about one of the chef’s most famous dishes, sea bass paupiette, or sea bass wrapped in potatoes. It is a classic at Le Cirque in New York and still made by special request at his restaurant Daniel. I’ve always wanted to try it and looking over the recipe, thought that I could easily bang it out in a night’s work. It’s basically a fillet of sea bass encased in long strips of very thin potato, then cooked in clarified butter to a crisp golden brown with perfect, meltingly tender fish on the inside. Doesn’t sound too challenging right?

My first step afoul was the potato I choose. Granted, it was the largest one I could find, but it still wasn’t long enough to wrap the entire fillet. So I had to double up on the strips, which of course wouldn’t allow me to create an enclosed package of potato goodness. I figured I would just wing it, and try my best to hold them shut over a pan of sizzling butter. That would be step 2 afoul, and the nice oil burn on the inside of my left wrist can attest to that. Step 3 afoul was something I cannot fix, that being that I have an electric stove, and I think this recipe really is only made for the even heat of a gas flame. And last step afoul was the fact that my non stick pan, while top notch, is a circulon and has a spiral patter on the bottom to promote even heat. This has the side effect of producing a spiral pattern on the potato layer. So all in all, the experiment proved slightly more difficult then I was imagining, but that being said, the end result was freaking delicious. I decided to share the recipe just in case there are any others out there who feel like emulating a legend. Plus, you will Really impress with this dish. I served it with a slight variation of the sauteed leeks that usually accompany the dish, and made creamed leeks.

Photobucket

Next time around, I will search high and low for a potato that is long enough, conduct the experiment with a gas flame and succeed! I am a determined lady, and one day I will be able to produce sea bass paupiette, and therefore be cool, like Daniel Boulud.

Sea Bass Paupiette, by Daniel Boulud

4 skinless sea bass fillets, no belly meat and each around 6-7 ounces and rectangular
2 Very long Idaho baking potatoes, peeled
4 Tbs clarified butter (instructions below)
Kosher salt

Photobucket

Using a mandolin, slice each potato into very thin slices. Do not rinse them, the starch is supposed to help them stay on the fish. Place one slice on the cutting board and overlap it slightly on one side with another slice. Repeat until you have reached the length of the fillet and then repeat with remaining potatoes until you have four potato packets. Season each fillet liberally with kosher salt and lay perpendicularly on each potato packet. Fold the edges of the potatoes over to enclose and brush the entire thing with 1 tsp clarified butter.

Pour the remaining clarified butter into a large non-stick pan set over high medium heat. Sauté the paupiettes until golden brown on all sides, about 2-3 minutes on each of the four sides.

How to clarify butter:

In a small saucepan over very low heat, add one stick on unsalted butter. Heat for around 10 minutes, until butter has melted and the white solids have sank to the bottom and a layer has formed on the surface. Carefully remove from heat and spoon off layer from surface. Pour the golden liquid into a separate pan, being careful not to pour the white solids as well. I have found using a damp coffee filter to strain works well, or just stop pouring before the milky solids are reached. Ta Da, clarified butter.